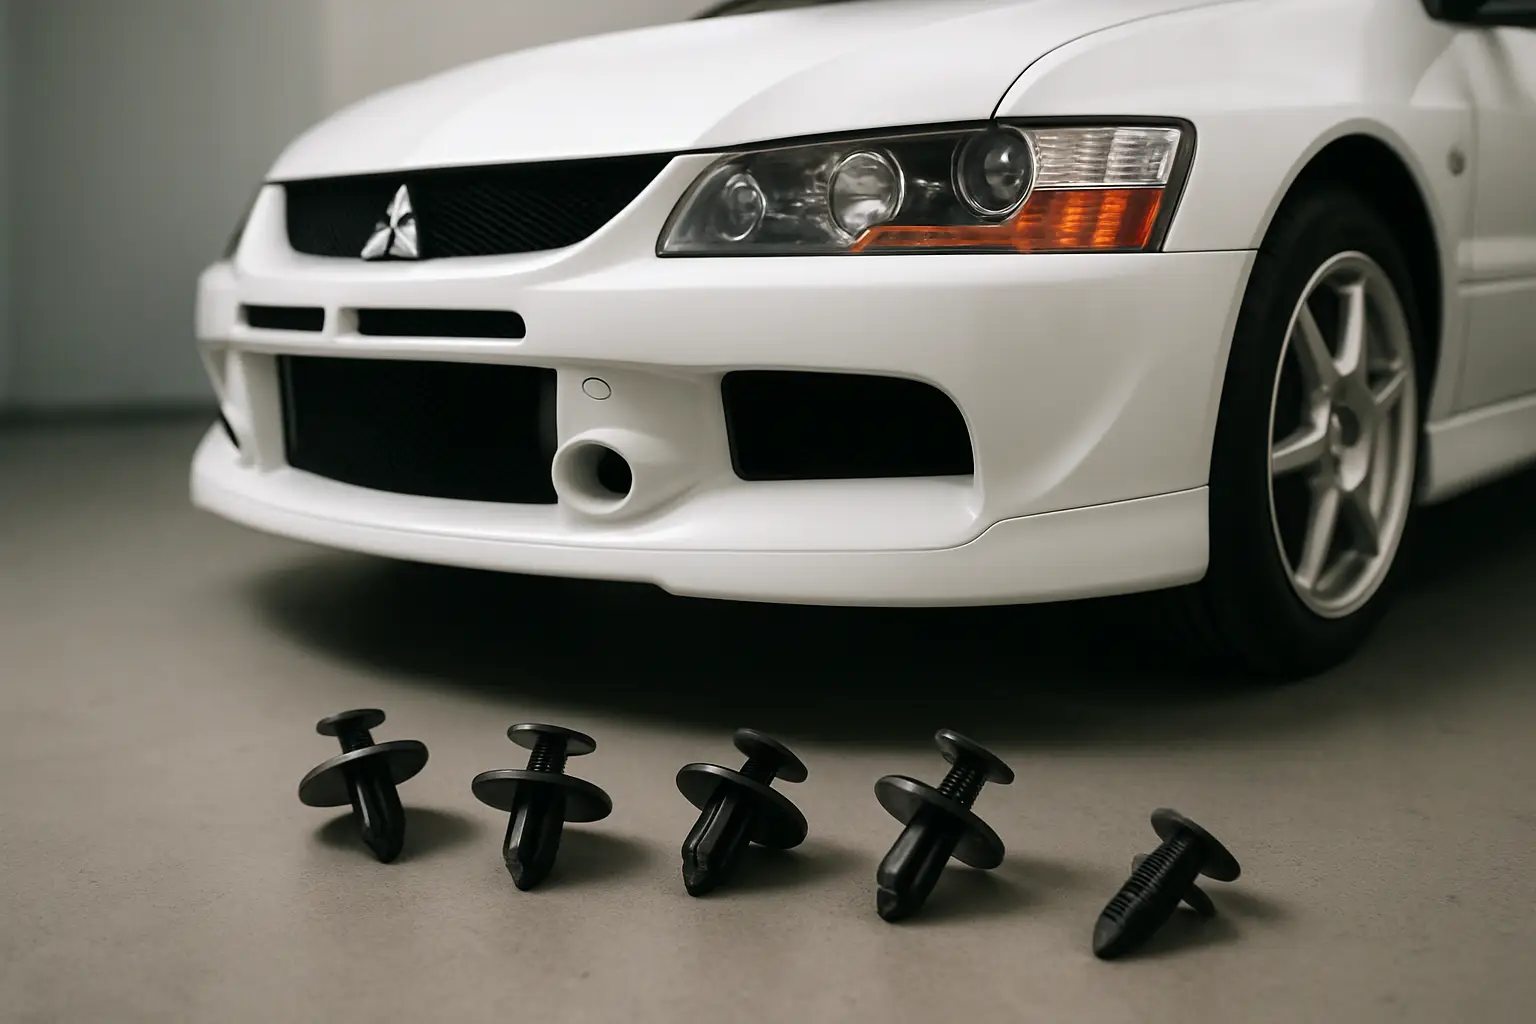
Evo 8 OEM Front Bumper Clips That Actually Fit
You know the feeling: you pull into a meet or a gas station, catch the front corner in your peripheral vision, and the bumper is doing that little “wave” at speed. On an Evo 8, it usually isn’t the bumper cover itself – it’s the small hardware that’s supposed to clamp everything together like Mitsubishi intended.
If you’re hunting for evo 8 front bumper clips oem, you’re already on the right track. OEM-style clips and retainers are boring right up until the day they save your paint, your fender edges, and your sanity.
Why Evo 8 bumper clips matter more than people think
The Evo 8 front bumper cover is light and flexible, but it’s also a big sail. At highway speed or on track, air loads the cover, the undertray area, and the corners by the fender. When the clip stack-up is correct, the bumper stays tight to the crash bar area, follows the fender line, and doesn’t rub the paint off the quarter edge.
When it’s not correct, you get three common outcomes. First is corner separation: the bumper starts pulling away from the fender where the side retainer and clips are supposed to lock in. Second is vibration that turns into cracking around mounting holes. Third is “mystery” panel gap changes that make the car look like it’s been hit when it hasn’t.
OEM clips solve two problems at once: they restore the original clamp load and they match the geometry of the holes Mitsubishi stamped and molded into the car. Universal push-pins can hold the bumper on, but they often don’t preload the panels the same way, and that’s where the gaps and rubbing start.
OEM vs universal: the trade-off is fitment, not just price
Universal clip kits are cheap and tempting, especially if you’re doing a quick bumper swap. They can be fine for an undertray or a splash shield where you just need something to stay put. The issue is that the Evo’s front end uses a mix of clip styles and shoulder heights depending on location.
An OEM-style push clip might have a specific head diameter so it actually covers the hole without pulling through. Another location might need a clip with the right stem length so it expands behind the plastic, not halfway inside it. When those dimensions are off, you overtighten, deform the bumper tab, and the “fix” becomes the reason it loosens up later.
There’s also the removal factor. Quality OEM-style clips are designed to be serviced. Cheap generics like to either snap on the way out or stay permanently compressed so they never grip the same again. If you’re the type who pulls your bumper for intercooler piping, fog light wiring, or track prep, that matters.
Where the Evo 8 front bumper clips actually go
People say “bumper clips” like it’s one part. On the Evo 8, you’re usually dealing with a few different fastening zones working together.
Upper bumper-to-radiator support line
Across the top edge of the bumper cover, you’ll typically find a row of plastic push clips and/or bolts depending on what’s been changed over the years. This row sets the bumper height and keeps the center section from bouncing.
If the bumper sags in the middle or you see a gap under the headlights that wasn’t there before, the top line hardware is the first place to check. Missing clips here don’t always cause the bumper to fall off – they cause the whole cover to “hinge” on the remaining points.
Fender corner lock-in (the spot everyone fights)
The bumper corner near the wheel well is where fitment lives or dies. This area uses a side retainer bracket and fasteners to pull the bumper edge into the fender line. If the retainer is worn, cracked, or bent, even perfect clips won’t hold the corner tight.
The tell is simple: you can push the bumper corner in with your palm and it looks perfect, but it pops back out as soon as you let go. That’s either a worn retainer, damaged bumper tabs, or the wrong clip style not engaging deeply enough.
Wheel well liner and lower edge
Inside the wheel well, the liner ties into the bumper. Along the lower edge, the bumper also interfaces with the splash shield/undertray area. Clips here keep the bumper from flapping and reduce the “parachute” effect at speed.
Track cars and lowered street cars often chew up this hardware first. Scrapes, heat cycles, and repeated removal turn once-snug clips into sloppy fasteners. If your bumper looks fine parked but starts moving around on the freeway, the lower edge hardware is a prime suspect.
Why clips fail on Evo 8s (even if the car’s clean)
On paper, a plastic clip should last forever. In real life, the Evo 8 is old enough that the original fasteners have been through a lot.
Heat is a big one. The front end lives near the radiator and intercooler piping, and the repeated heat cycling hardens plastic and makes it brittle. UV exposure and road salt don’t help.
The other killer is bad removal technique. If you pry the head up without releasing the center pin correctly, you distort the clip body. It might reinstall, but it won’t clamp with the same force. Do that a few times and now you’ve got “good enough” clips everywhere – until you hit a bump and the bumper corner decides it’s done.
Then there’s the hidden issue: misalignment from previous work. Aftermarket intercoolers, crash bar changes, or even a slightly tweaked bumper bracket can shift hole alignment just enough that you have to force clips in. Forced clips don’t last.
Installing OEM bumper clips without damaging tabs
If you’re restoring your front end, treat the bumper tabs like they’re irreplaceable. Because once they crack, you’re either plastic-welding, using zip ties, or shopping for another bumper cover.
Start by dry-fitting the bumper with minimal hardware. Get the bumper centered, check headlight gaps, and confirm the corners sit naturally near the fenders. If you have to shove the bumper hard to make a hole line up, stop and find out why. Usually it’s the side retainer, the liner pulling the corner down, or the bumper sitting on an intercooler pipe.
When you install push clips, make sure the clip body is fully seated in the hole before you press the center pin. Pressing the pin early is how you expand the legs in mid-air and chew up the hole. For stubborn clips, a light squeeze on the clip legs (if accessible) or backing the pin out first makes a big difference.
On the fender corner, don’t rely on one fastener to do all the work. The corner is a system: retainer condition, bumper tab integrity, and the correct clip/bolt combination. If any one is weak, the rest get overloaded.
When OEM clips won’t fix it: the “it depends” cases
Sometimes you can replace every clip and still have a bumper that won’t sit right. That’s not the clips lying to you – it’s the surrounding parts.
If the side retainers are worn smooth or cracked, the bumper edge has nothing positive to lock into. If the bumper tabs are split, the clip can’t clamp the tab without pulling through. If the fender is slightly pushed in from an old parking-lot hit, the gap will fight you forever unless you correct alignment.
And if you’ve got an aftermarket bumper, all bets are off. Some replica covers have hole locations that are “close enough” until you try to use OEM hardware. In those cases, you either modify the holes carefully or accept that universal hardware is a compromise you’re choosing, not a fix you’re missing.
What to look for when buying evo 8 front bumper clips oem
You’re aiming for correct dimensions and consistent material quality. The easiest way to get there is to buy OEM replacement-style fasteners that are specified for the chassis location, not a random mixed box.
Also pay attention to quantity. Most people replace only what’s missing, then wonder why the bumper still vibrates. If half the clips are original and half are new, the clamp load is uneven. The bumper will move at the weak points, and movement is what turns small gaps into cracked paint.
If you’re already doing front-end work (intercooler install, radiator service, fog light refresh), it’s smart to refresh the hardware at the same time. It’s a small cost compared to repainting a bumper edge that’s been rubbing the fender.
If you want a source that’s Evo-only and obsessed with fitment the same way you are, Evo Motor Parts stocks OEM replacement components with the goal of factory-correct installs and track-proof reliability.
A fast sanity check after install
Once everything is clipped in, don’t just look at it in the garage. Close the hood, turn the steering wheel lock-to-lock, and check that the wheel well liner isn’t tugging the bumper corner. Grab the bumper at the corner and give it a controlled shake – it should feel like it’s attached to the car, not like it’s hanging off it.
Then take a quick drive and listen. A properly clipped Evo 8 front bumper is quiet. If you hear plastic fluttering or a new rattle over small bumps, that’s usually a liner or lower edge clip not seated all the way.
The goal isn’t perfection for Instagram. It’s a front end that stays tight at speed, doesn’t chew up your paint, and can be removed and reinstalled without breaking something every time. Get the right OEM-style clips in the right places, and the Evo’s front bumper stops being a recurring project and goes back to being what it should be – ready for the next pull, the next canyon run, and the next track day.