Evo X Shifter Base Bushings: Slop Diagnosis & Install Guide
Fix Evo X shifter slop without masking a larger fault
Solid base bushings can remove movement between the cabin shifter assembly and the body. They cannot repair worn cable ends, clutch drag, damaged synchros or an incorrect adjustment.
Evo X shifter base bushings change how firmly the shifter housing is attached to the chassis. The factory rubber inserts isolate vibration, but age, compression and repeated console service can allow the complete housing to move when the driver changes gear. A solid bushing kit reduces that mounting movement and can make the gate feel more direct.
It is important to identify where the play originates. Side-to-side movement in neutral, movement of the whole shifter base, looseness at the under-hood cable ends and resistance selecting a gear are different symptoms. Replacing every bushing at once can hide the evidence needed to diagnose a cable, clutch or transmission problem.
Perform a stationary slop test
Park on level ground, apply the parking brake, switch the engine off and keep the transmission in neutral. Remove only enough trim to see the shifter housing. Have a helper move the lever gently while you watch the four base mounting points. If the housing lifts or slides relative to the body, the base inserts deserve attention. If the base stays fixed but the lever or cable moves excessively, continue the diagnosis elsewhere.
- Confirm a 2008–2015 Evo X with a 5-speed manual transmission; do not assume MR/SST fitment.
- Check that the shifter base, console brackets and original bolts are not bent, cracked or missing.
- Inspect the lever pivot and cable connections for separate play.
- Note whether the problem is present with the engine off, engine running, or only when hot.
- Check clutch release and hydraulic condition if first or reverse gear engages poorly.
- Verify that aftermarket short-shifter parts have the correct hardware and adjustment.
Featured STM Evo X shifter-base kit
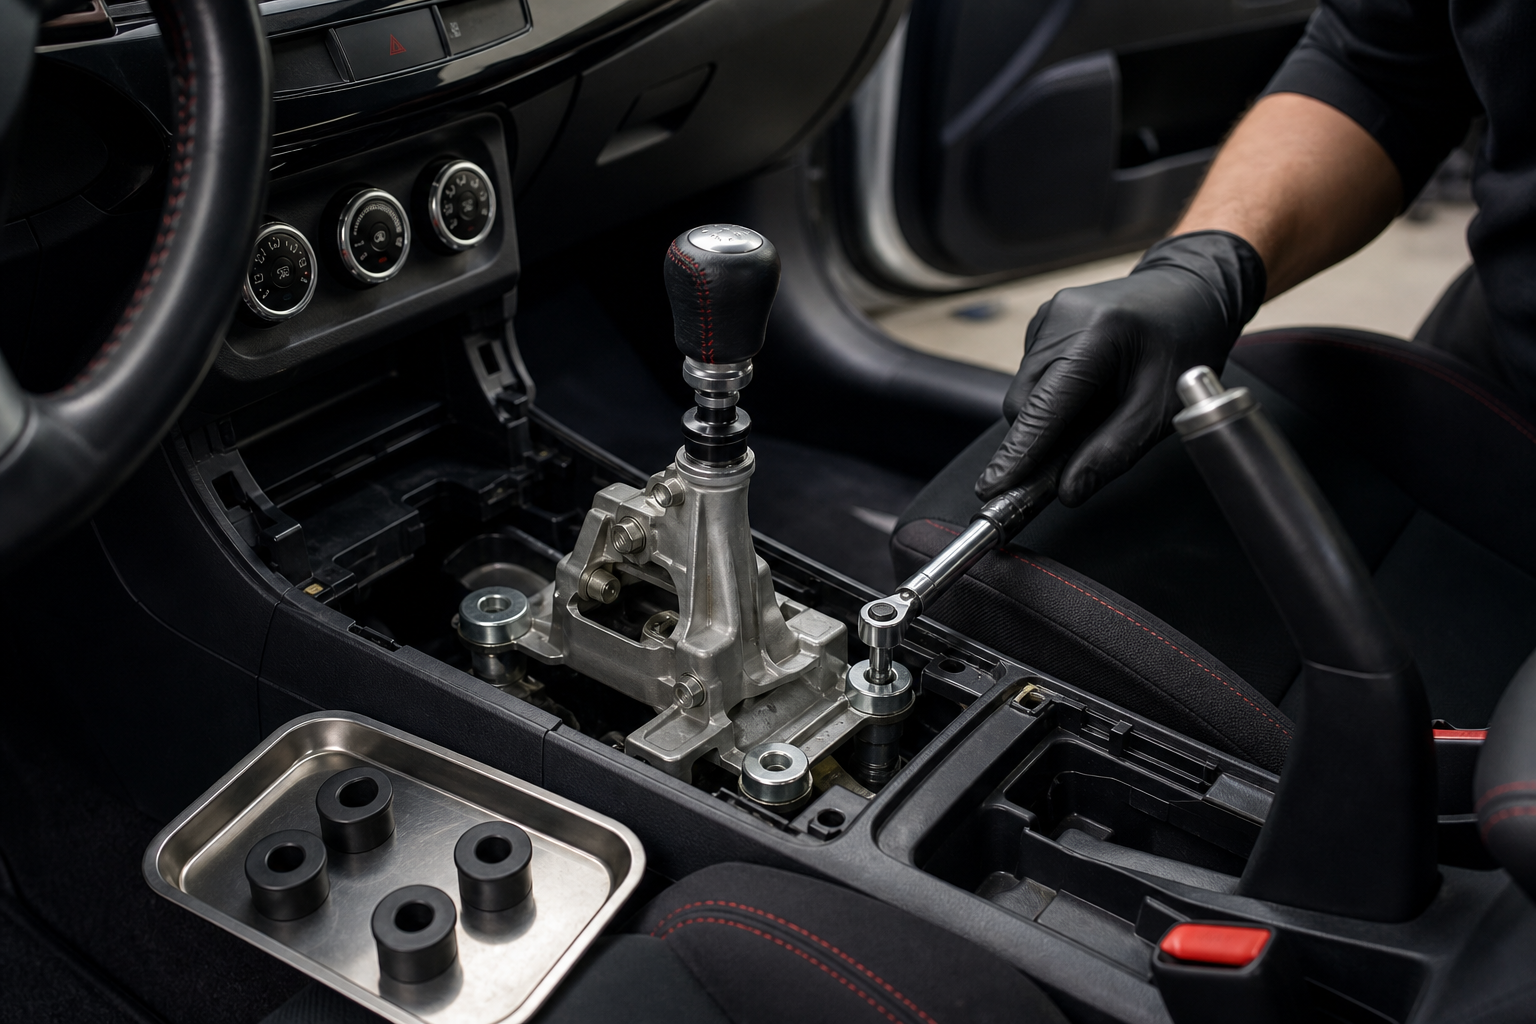
The STM Evo X Shifter Base Bushing Kit is listed for 2008–2015 Mitsubishi Evolution X models with the 5-speed manual transmission. The kit includes four machined aluminum bushings designed to replace the factory rubber inserts and metal collars.
The product notes place the new bushings on the bottom side of the shifter base and state that the original bolts can be reused, sitting flush with the base and bushings. The listing also identifies USA manufacture and a lifetime warranty to the original purchaser against manufacturing defects. Confirm the current terms on the live page.
View the shifter-base bushing kitBase bushings versus cable bushings
| Location | Typical observation | Next check |
|---|---|---|
| Cabin shifter base | The entire housing moves against the body while the lever is operated. | Mounting inserts, collars, bolts and base plate. |
| Under-hood cable ends | The cabin base stays still, but the cable-end joint has visible play. | Year-specific cable bushing and cable condition. |
| Lever pivot | Play is concentrated at the lever or pivot inside a stable housing. | Pivot hardware, short-shifter parts and lubrication guidance. |
| Clutch/transmission | The lever feels blocked or grinds even though external movement is controlled. | Clutch release, fluid, cables, adjustment and internal diagnosis. |
STM under-hood cable-bushing listings are separated by model year: a 2008 Evo X cable-bushing listing and a 2010–2015 Evo X listing. Because those ranges do not cover every year, do not guess—match the vehicle, transmission and cable-end style to the specific product before ordering.
Installation sequence for the cabin base
| Stage | Action | Verification |
|---|---|---|
| 1. Prepare | Record radio settings if needed, isolate power per procedure and protect console surfaces. | Car is secure, cool and in neutral. |
| 2. Remove trim | Release clips and fasteners with plastic trim tools, then unplug only the required connectors. | No broken tabs, stretched wiring or hidden screw left behind. |
| 3. Inspect | Move the lever gently and confirm the housing is the source of play. | No cracked base, loose bracket or damaged bolt thread. |
| 4. Exchange inserts | Remove all four OEM rubber inserts and metal collars; place the new bushings on the bottom side as specified. | Each bushing sits flat, centered and in the same orientation. |
| 5. Tighten | Reuse the original bolts only if undamaged and tighten evenly to approved service guidance. | Base is flat with no distortion or pinched harness. |
| 6. Function check | With the engine off, select every gate before refitting trim; then test safely according to the service process. | Full lever travel, reverse lockout operation and no binding. |
What the upgrade should—and should not—change
A properly installed solid base kit should reduce housing movement and make the lever response feel more immediate. It may also transmit a little more mechanical feel or vibration because rubber isolation has been removed. It should not shorten the lever throw by itself, change the gear ratios or cure a clutch that does not release.
If the lever becomes tight after installation, stop and recheck bushing seating, base alignment, bolt tightening and trapped trim. Do not force the lever into gear. Uneven mounting can distort the housing or load the cables.
Troubleshooting after installation
The base is solid but the lever still feels loose
Inspect the lever pivot and the under-hood cable ends. The base kit only controls movement at the four cabin mounting points.
First and reverse are difficult with the engine running
Compare operation with the engine off. Difficulty only with the engine running can indicate clutch-release or hydraulic problems rather than bushing slop.
A new vibration or rattle appears
Check console clips, connectors, boots and fasteners before blaming the metal bushings. A loose trim panel can become more noticeable after the base is solid.
The original bolts do not sit correctly
Stop and verify that all factory collars were removed, each new bushing is positioned on the correct side and no damaged or non-original hardware is present.
Frequently asked questions
Does the featured kit fit the Evo X MR?
The product is listed for 5-speed manual Evo X models. The MR uses the SST transmission, so do not assume compatibility.
Will base bushings make the throw shorter?
No. They reduce movement at the mounting points; they do not change the lever geometry.
Should base and cable bushings be replaced together?
Only when inspection supports both repairs and the cable-bushing listing matches the exact year. Diagnose each location separately.
Make the base solid, then verify the whole shift system
Install all four bushings evenly, preserve cable travel and confirm every gear with the engine off before a controlled road test.
Check live STM kit availability